DivicaSales is back once more to provide you with another exciting gaming guide! This week's article will focus on the RuneScape 3 quest, Desert Treasure. We will take a deep dive into the requirements, recommendations, and methods needed to complete this quest with ease. But, before we get into finer details, ensure your RuneScape journey is as well-informed as possible; take a look at our other blogs covering the game, such as UnderGround Pass or The Brink of Extinction.
Now, let's move on to the important stuff! How to best navigate the RS3 Desert Treasure quest and better enjoy your RuneScape journey.
What is Desert Treasure in RS3?
Desert Treasure in RS3 is a quest in which the player must gather the Diamonds of Azzanadra to be able to free Azzanadra the Mahjarrat. He is trapped in a pyramid prison, residing in the Kharidian Desert, which is how the quest earned its title.
Rumors have spread throughout Varrock and Al-Kharid, stating an archaeologist has found clues indicating the treasure is hidden deep within the desert. Those ready to offer assistance could be handsomely rewarded for their efforts, but this quest is taxing, so be prepared.
Desert Treasure Quest Requirements in RS3
As with almost all RuneScape quests, there are some requirements you must meet before you can embark on this exciting treasure hunt. Below, we have compiled a list of skill, quest, and item requirements, so let's get into it!
Quest Requirements
- The Dig Site
- The Tourist Trap
- Temple of Ikov
- Priest in Peril
- Waterfall Quest
- Troll Stronghold
- Death Plateau
Now that we've covered the essential quests for progression, let's look at the skills needed.
Skill Requirements
- 50 Firemaking
- 50 Magic
- 10 Slayer
- 53 Thieving
- 80 Woodcutting
Lastly, we'll touch on the items required, which is quite the list due to the difficulty and length of this quest.
Item Requirements
- Ashes
- Blood runes
- Bones
- Charcoal
- 650 Coins
- 6 Molten Glasses
- 12 Magic Logs
- 6 Steel Bars
- Chocolate Cake/Cake/Chocolate Bar
- Climbing Boots
- Face Mask
- Garlic
- 100 Lock Picks (average)
- Ice Gloves
- Silver Bar
- Spice
- Spiked Boots
Now that we've brought all the essentials to light let's explore the recommendations to solidify success when embarking on Desert Treasure in RS3.

RS3 Desert Treasure Recommendations
While not essential to your cause, these recommendations will surely provide a helping hand along the way.
Skill Recommendations
- 47 Agility
- 50 Mining
- Thieving (over 53)
- Item Recommendations
- Combat Equipment
- Runes
- Ice Arrows
- AntiPoisons
- Active Lodestones
- Skills Necklace
- 1,500 coins
- Desert Heat Protection
- Single-tick Teleports
- Druid Pouch (charged)
- Super Energy Potions (several)
- Broomstick (enchanted)
- A Wicked Hood
Quest Recommendations
For the absolute best chance of success, you'll want to have completed both "In Search of the Myreque" and "As a First Resort."
Enemies to Slay in Desert Treasure RS3
There are quite a few foes to go head to head with in RS3 Desert Treasure, so let's take a look at those so we know exactly what we're up against.
- Desssous (level 84)
- Kamil (level 88)
- Fareed (level 84)
- 2 Damis (level 86)
- 5 Ice Trolls (level 89)
There is also the potential to face a Stranger (level 81); however, you will only encounter this foe if you have held too many of the diamonds for too long.
Getting Started With Desert Treasure in RS3
With the requirements and other expectations out of the way, let's get onto the actual quest. To start with RS3 Desert Treasure, go to the Bedabin Camp in the Kharidian Desert. You have a few options for getting there: walking, teleporting with the enlightened amulet, or a carpet ride.
Upon arriving, speak with the archaeologist located by the magic carpet merchant; he will tell you he is the world-famous Asgarnia Smith. He has uncovered the Temple of Ikov and the Brimhaven Agility Arena, and your next step is to ask him for a quest, at which point he will inform you he needs assistance with finding an ancient artifact.
You must next speak with Terry Balando in the Exam Centre and get a translation. Give him the item, and you will then be asked to wait a few moments. You must then speak with him again to receive a journal and to be informed the item has been translated; take the journal you were given back to Asgarnia.
The archaeologist will ask if you wish to read the journal, select "Do Not Read" and he will read the journal himself. Speak with him once more, and he will ask for your assistance, with promises of splitting the treasure found. If you agree to the arrangement, you will be told to split up in search of clues. Now, with the wheels in motion, let's move on to the next segment of our guide.

Desert Treasure RS3 - The Diamonds of Azzanadra
There are four Diamonds of Azzanadra, and Asgarnia has requested your assistance in locating them. He has tasked you with locating information at Bandit Camp while he will head to the Bedabin nomads to search for clues.
Before your arrival at the camp, ensure you do not wear or possess any Saradomin or Zamorak items, as these will cause the camp members to attack you; even if you are to survive, Eblis will declare you a false profit and refuse to speak with you.
When you arrive, head to the western side of the camp and purchase a bandit's brew; speak with the bartender after your purchase and ask if he knows about the four diamonds. He will appear shocked by your knowledge and inform you that there are, in fact, tales of these diamonds. However, if you wish to learn more, you'll have to speak with someone with better knowledge of the desert's history.
After making your way to the easternmost house, speak with Eblis. Ask him about his bandits' hostility and the history of the camp. At which point, he will tell you how, generations ago, their god was banished, leaving them to fend for themselves against the Zamorakian and Saradomin. He will go on to tell of the many attacks they endured, the loss of their lands, and how they were forced to set their camp out in the desert. He states their god is trapped in a stone structure south of the camp, and they are awaiting his return to seek vengeance upon those who have wronged them.
Elbis will then answer your questions regarding the diamonds, telling you they were taken by warriors of Zamorak; if you want to retrieve the diamonds, you must slay these creatures.
Desert Treasure RS3 - Mystical Mirrors
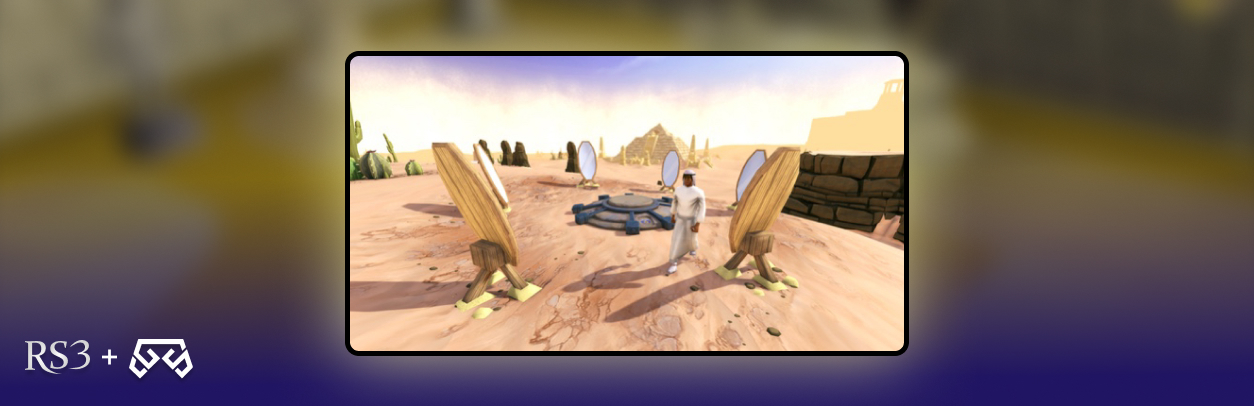
Eblis needs some items to create a scrying glass; use them on him, and he can sense the diamond's power and give you a rough location of their whereabouts. He will then tell you to meet him southeast, at the site of the Bandit camp lodestone.
You'll find him standing between six mirrors on a small hill. Upon looking into the mirrors, you will see six locations around Gielinor. Two of these locations, the pyramid and bandit camp, are not where the diamonds are to be found. Below are the locations of the diamonds:
- Canifis
- An icy location near Trollheim
- A smoky well near Pollnivneach
- Benches and trees between a Fishing Guild and Baxtorian Falls
Now, you have to embark on the adventure of obtaining the diamonds; remember, once you have them in your possession, try to keep them out of your inventory, as there is a chance the aforementioned level 81 stranger will attack you.
Locating the Blood Diamond in Desert Treasure RS3
The next step in our RS3 Desert Treasure guide is to locate the diamonds, so let's begin with the Blood diamond.
Enter the pub in Canifis, and a cutscene will begin. After that, you need to speak with Malak. When he learns of your adventure, he informs you another vampyre has the Blood diamond and informs you of how to kill him and where he is.
Collect the sacrificial offering pot from Ruantun in the sewers of Draynor. It's imperative you speak with him about the pot, or you will need to return to Malak and begin the process again. Trade the silver bar for the pot. You will then need to bless the pot using holy power; this will weaken Dessous. This must be done with the assurance of the High Priest of Entrana. It's important that you bank all your weapons and armor before you make your way to Entrana; make use of the wicked hood for teleportation if you want to get there quickly. When you explain your intentions to the priest, he is happy to help; once the process is complete, head back to Canifis and speak with Malak.
Malak will inflict 50 damage to you in order to fill the pot with some of your blood. At this point, you must crush some garlic to get powder to add to the pot, then add spice to the mix. This combination will complete the procedure, and you will be left with a blessed pot (complete), so now you're ready to lure Dessous from his tomb.
With everything prepared, you're now ready to head to the graveyard in Mort More swamp. Remember to keep an eye out for ghast in the swamp, which could rot your food supplies; though, if this occurs because you're running through, the damage should be minimal.
Battling Dessous
Dessous is a level 84 opponent with 25,000 life points, and he can throw melee, ranged, and magic attacks. You'll also want to remain alert as if you begin to run from the fight; he may teleport to you, and if you stray too far, you could cause him to disappear, and you'll need to conduct the blessed pot ritual all over again.
He is weak to air spells, so fortunately, utilizing these can see you taking him down fairly quickly, but keep in mind, a requirement for killing him is to use melee, ranged, or a dwarf multi cannon. Using the correct balance can end the battle quickly.
Once you've successfully killed Dessous, return to Malak and trade the blessed pot for the blood diamond. With the diamond in your possession, head straight to the Canifis bank to deposit it and avoid the Stranger appearing with their attack. Now that you've acquired the blood diamond let's look at how to get your hands on the ice diamond.

Obtaining the Ice Diamond in Desert Treasure RS3
It's at this point in the quest that you will be fighting an uphill battle. This is due to the fact that in the icy area, your stats are all reduced by one every few seconds. Not to mention the 200 life point damage or the 10% damage that is regularly dealt to your adrenaline and run energy. Additionally, if you enter the area with a familiar, Kamil will lose interest and leave before reappearing with health restored.
With all the downsides out of the way, let's get onto the battle, starting with getting there. Make your way to Trollheim, go to the northwesternmost fork, and take the path leading to the ice path. When you reach the end of the path, you will see an ice gate and a crying troll child.
Offer the child the cake, and he will tell you how the 'bad man' has taken his parents for stealing his diamond; promise to save his parents, but only in return for the diamond. The child will agree, and the gate will open; however, the path you need to take is covered by ice. To enter the cave, you must first defeat five ice trolls. You will know you've been successful when you see the message 'A chunk of ice falls away from the cave entrance…' enter the cave and take a moment to restore any stats or restock items if needed. Keep your eyes open, however, as level 95 wolves reside here and could pose a threat; using Protect from Melee is a great way to protect from further damage.

Battling Kamil
Once you reach the end of the path, Kamil will be in your sights. He is level 84 and has 21,000 life points, but be cautious; he is more powerful than his stats suggest, as he possesses a special attack with similar effects to Ice Barrage. Because of this, even with high combat, it's essential you are stocked on food and potions. Another heavy recommendation is to use auto-retaliate, pray Protect from Melee, and use magic as your primary attack. Unfortunately, it doesn't get easier, as only fire spells are effective against him, and although you can use other combat methods, the results will be far less satisfactory.
Now, even with your strategies considered, you'll still need to ensure you have high accuracy, at least 1500+. In the first half of the battle, he will take every opportunity to freeze you, in turn inflicting a stun, so make sure to make use of Freedom and Anticipation, especially focusing on this if you are low on health, as it can bring the battle to a devastating end for you.
Throughout the duration of the fight, try to stay close to Kamil, as this will see him using melee attacks rather than ice magic. Choosing any other method will have him casting his freeze spell several times per minute, with each hit dealing 50 damage.
Once you finally slay Kamil, turn off prayers and use food scarcely. Though the battle is over, remember you have to trek back through the 200 life point damage from the cold, as well as any other hits taken from the cold.
Head all the way up the winding ice path of the mountain until. You find an icy ledge. Here's where your spiked boots come into play; put them on and begin to climb the ledge. Falls are highly likely, so be prepared for 200 damage each time that happens. You can prepare for this by having some super restore potions on hand. Or, if you'd prefer, the use of a surefooted aura can see you taking on the path with no issues in one go.
Continue on the path until you reach the top and see another gate and bridge. Beyond the bridge, you will see the troll child's parents encased in ice; head over the bridge and use your best fire spell to free both the troll mother and father. With both parents now free, they will take you back to the gate where you met their child, and you will be presented with the ice diamond. Teleport and bank the diamond and restore any stats before heading to the next part of this quest.
Retrieving the Smoke Diamond in Desert Treasure RS3
Once you're ready to set off again, head to Pollnivneach and make your way around the hill from the south side until you spot a well. This is the entrance to the Smoke Dungeon. Ensure you have brought either a face mask or face protection equipped before you climb down into the well; failure to do so will inflict 200 life point damage every 12 seconds.
Once in the dungeon, you will find a large cavern at the center, which houses a chest. Any attempt to open this chest will present you with the message 'Light the path to claim the key.' There are four torches, once in each corner of the dungeon, and you must light them in order to open the chest.
An easy enough task, it would seem? Unfortunately not. Each torch only remains lit for 5 minutes before being extinguished. You will first need to plan out your route through the dungeon before running it, taking potions, and/or using a spirit terrorbird to restore your run energy where necessary.
When you successfully light all the torches, run to the center of the cavern and open the chest; this will provide you with the warm key. It is essential that you run for the duration of this task, as walking to the chest will mean the first torch will burn out, beginning the whole process again.
With the key in your possession, restock the essentials and head back in to fight Fareed.

Battling Fareed
Go to the east section of the dungeon and use the key on the gate to awaken Fareed. With level 84 and 20,000 life points, you still have quite the opponent to face, even with stats gradually dropping from previous encounters.
This is where your Ice Gloves come into play, as you will need them to wield a weapon; though it is possible to use off-hand weapons, the results won't be as satisfying. When using magic against this opponent, remember he is only affected by water spells; using any other magically imbued attacks will prove pointless. Some weapons will also be useless, but ranged abilities can still be helpful.
After the battle is done and you've taken down Fareed, you'll either find the Smoke Diamond instantly in your inventory or dropped nearby. Follow in your previous footsteps, teleport, and bank the diamond as quickly as possible to avoid stranger encounters.
Obtaining the Shadow Diamond in Desert Treasure RS3
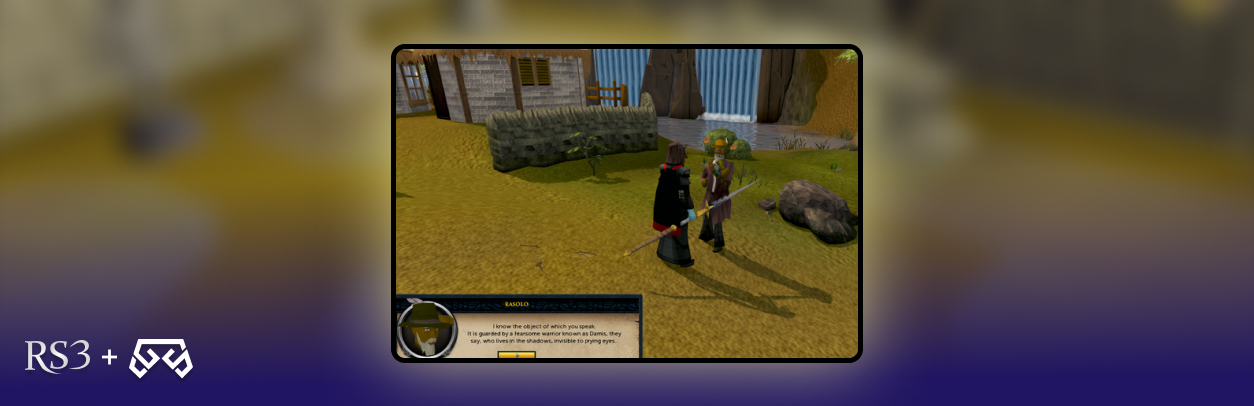
For the last retrieval in RS3 Desert Treasure, you'll want to head west of the Fishing Guild until you encounter several moss giants. Just north of them, you will see a fenced-in area by Baxtorian Falls; this is where you will find Rasolo.
Upon speaking with him regarding the diamond, he will inform you of the smoke diamond's location. However, it is in a dungeon that can only be accessed by the use of the ring of visibility; not only that but the location is also guarded by Damis. Rasalo offers you his ring of visibility, but only if you can retrieve his gilded cross from Laheed, a member of the Bandit Camp.
For this next part of our Desert Treasure RS3 adventure, you'll want to have food, anti-potions, and an abundance of lockpicks or hair clips (as many as you can carry) and then set off for the Bandit Camp. When you arrive, locate the southernmost tenet and discover a secure chest. There are three locks you have to get through, and any failure will reset the locks; worst of all, each failure breaks your lockpicks and inflicts you with a loss of 20-30 life points. You'll need to repeat this process until you successfully unlock all the locks and retrieve the gilded cross.
With the cross in your inventory, return to Rasolo and trade the cross for the ring of visibility. Place the ring in your ring slot and head east until you find a ladder in the fenced picnic area, the entrance to the Shadow Dungeon.
Facing Damis - The Final Foe in RS3 Desert Treasure
Climb down the ladder to enter the Shadow Dungeon and follow the directions shown on the map to locate Damis' lair. Damis will appear once you enter the center of the large easternmost cavern. It's important to note that if you do not enter from the southwest and go straight to the center of the cavern, you will not trigger Damis's appearance.
Damis is a level 84 enemy with 20,000 life points; however, he will only attack using melee. Though this may sound like a win in itself, Damis has two forms that he will take on during the battle. Both forms have the same leveling and life points; however, in his second form, 20 prayer points will be drained every 0.6 seconds in combat. During the battle, if you die after killing his first form, upon return, you won't need to repeat the process and will only face the second.
During the battle, you'll notice a black area in the northeast corner; these act as safe spots for you. However, Damis may vanish if you get too comfortable, beginning the battle again. Your best bet for success in this fight is to use Earth spells, couple them with stunning abilities like impact, and utilize the safe spot to avoid too much Prayer point damage from his attacks.
You'll also want to avoid the use of multi-target abilities, as these can bring forth giant skeletons and shadow hounds; this will only add to the stress of an already fierce encounter.
Once you successfully take Damis down, the Shadow Diamond should be within close quarters. Collect it and teleport out before banking the diamond. Now, with all four diamonds in your possession, it's time to start wrapping up this Desert Treasure RS3 quest. So, let's take a look at the next steps.

Freeing Azzanadra in Desert Treasure RS3
Unlocking the Pyramid
Return to the Bandit Camp and speak with Ellis, ensuring you have the diamonds in your possession. He will explain how Azzandra's life force has been trapped in the diamonds by the Zamoraks and Saradominists. You will be instructed to place the diamonds in the structures surrounding pillars and recant the concealment spells, thus freeing Azzanadra.
When you embark on this part of your journey, it's important to know that each obelisk can only receive a specific diamond; don't worry, though, as the diamonds and the pillars share key features that should make your decision much easier. If you do approach the task with the trial and error mentality, however, that will be fine.
With all diamonds in their rightful place and the spell in action, the pyramid doors will then unlock, allowing you to climb the stairs and enter.
Leveling Up
When you enter the pyramid, you're likely to face scarab swarms(level 86) and mummies (level 77). These foes attack using melee, though the scarabs can also poison you, so be prepared. In this segment of our RS3 Desert Treasure guide, you will work through the pyramid levels to complete the rescue of Azzanadra.
Each time one of the mummies or scarab swarms appears, you will be frozen until their animation ends, though you can prevent this with the scarabs by trying to position yourself behind a mummy when they appear.
Another downside to this rescue mission is the randomly placed traps throughout the levels of the pyramid. If you step on them or remain stationary for too long, you will be returned to the pyramid’s entrance. For this reason, you need to remain vigilant and keep moving, as well as wear lightweight armor to negate the traps.
So, let's take a look at the levels and what you need to do on each one:
Level 1
Make a dash for the ladder to level 2. Fortunately, this level is rather small and has fewer mummies, so it shouldn't be too difficult. Additionally, if given the chance, flash your prayer to save your run energy.
Level 2
It is at this point the traps come into play, and you will have some more mummies to face than the previous level, so try to stay on your toes. Make a run from the level 2 ladder to the level 3 ladder and progress to the next floor.
Level 3
At this stage, the difficulty is ramped up. The area is significantly larger than those before it, and you're likely to face a lot more mummies, plus an influx of traps. So stay alert as you make your way to the level 4 ladder.
Level 4
Make your way quickly from the level 3 ladder to the altar room. The area here is also quite sizable and is home to quite a few more mummies than previous encounters. The altar room is the only place on this level that is lacking foe, so don't delay. There is a slim chance a scarab swarm will be seen in the altar room; however, this only occurs if you are being chased upon entering the room.

Azzanadra
Once you have finally found him, begin conversing. Azzanadra will ask about the God Wars, unaware of the end and the outcome. He will also note his surprise that he can no longer hear Zaros in his mind. He will soon accept this new reality, and as a reward for freeing him, he awards you with the Ancient Magicks of Zaros.
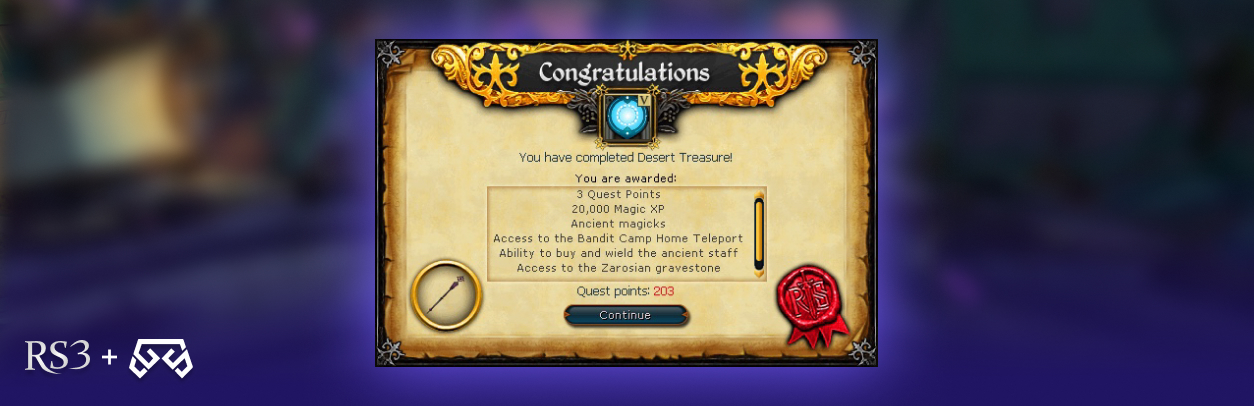
And that's it; you've successfully completed Desert Treasure RS3!
Rewards from Desert Treasure RS3
After your long and treacherous battle, we're sure you're itching to know the rewards for all that hard work. So, below, we have listed the items and other rewards gifted for the completion of RS3 Desert Treasure:
Rewards
- 3 Quest Points
- 20,000 Magic XP
- Ring of Visibility
- 2 Treasure Hunter Keys
Abilities Unlocked
- Ability to use Ancient Magicks
- Access to the Smoke Dungeon
- Access to the Zarosian Gravestone
- Bandit Camp lodestone is unlocked
Music Unlocked
- Bone Dry
- Frostbite
- Path of Peril
- Sarcophagus
- Scarab
Desert Treasure RS3 FAQ
As Desert Treasure is quite a long-winded quest, there's sure to be some confusion from time to time. So, in an effort to help our readers avoid confusion and the risk of dedicating more time to an already time-consuming quest, we've provided some of the most frequently asked questions. Check them out below.
How Long Does Desert Treasure Take in RS3?
The official quest length is stated as 'very long,' most players can expect to spend between 4-6 hours on this quest. Though this could take significantly longer if you encounter any issues or face mistakes, make sure you are adequately prepared before you embark on Desert Treasure in RS3.
Is Desert Treasure in RS3 a Direct Requirement for Other Quests?
Yes, as with many quests in the game, they interlock with other game content as requirements for completion. So, we've provided the quests below that call for Desert Treasure as a direct requirement.
- City of Senntisten
- Do No Evil
- Recipe for Disaster
- Recipe for Disaster: Defeating the Culinaromancer
- The Curse of Zaros
- The Temple of Senntisten
- Wandering Ga'al
Desert Treasure RS3 Conclusion
With little left to be said regarding this exciting quest, all there is left to do is wish our readers the best of luck on their next RuneScape 3 adventure! We will be back next week with another must-read quest guide, but until then, why not take a look at our library? Plus, if you had any difficulties during this quest or any others you embark upon, why not browse our services? We may have the currency you need for success. Until next time!


