Completing the Sixth Age quests will take some time, but fortunately for our readers, our RS3 Desperate Times guide is here for you to take the lead and continue the lore of The Elder God Wars quest series. This is a direct continuation of the recent events of your encounter with Jas during Sliske’s Endgame. This quest will involve a bit of everything, from combat, to puzzles you must solve to advance, so let's begin!
Desperate Times Requirements RS3
To complete the quest, you must meet some requirements. You must be a Member since this quest is only available for P2P players. Moreover, Desperate Times RS3 is a medium length quest, so it will take around 30 to 45 minutes to go from beginning to end. Likewise, you should be able to defeat five level 50 enemies. Outside of that, here are all the requirements for this quest:
- Completion of You Are It and The Needle Skips quests.
- 50 Divination
- 50 Mining
- 50 Smithing
- 3 Rune Bars
- 2 Runite Stone Spirits
- 10 Mind Runes
- 10 Gleaming Energy
- An Old Necklace or Necklace of Charos
- An outfit set that grants you access to the Black Knights’ Fortress or a Skull of Remembrance, which you can use to teleport directly inside.
These are the minimum requirements you need to start the Desperate Times RS3 quest; however, for quick mobility from one point to another, we recommend the following items:
- Access to a Fairy Ring
- Portable Fairy Ring, Tokkul-Zo, or Grace Elves attuned to the Zanaris Fairy Ring.
- Dig Site Pendant or Archaeology Journal for quick access to Varrock Dig Site
- 2 Phoenix Lair Teleports
- 2 teleports to Varrock.

Desperate Times RS3 Quest
The first step in starting this quest is to head to Burthope Castle and find Seren on the first floor. Talk to her; she will invite you to join her council and explain her cause.
Seren’s Plan And The Council
Seren will explain that the Elder Gods see life in Gielinor as food for their unhatched children. Her plan is to show the Elder Gods why life is worthwhile, just as she was taught. To begin this task, Seren seeks to impress Bik first by building a garden. She will ask you to negotiate the location, the workforce, and seed collection from all the council members.
At this point of Desperate Times quest in RS3, you should head to one of the following to ask to use their land:
- Zarador to use the Feldip Hunting Ground.
- Vanescula Drakan to use the swamps of Morytania
- Osman to use the Northern Desert.
Once you finish this part of RS3 Desperate Times, move to find the workforce; the first one you should speak with is Moia since she will summon an undead force. However, you can talk to Brundt the Chieftain to use the Fremennik or Sir Amik Varze to use the White Knights.
For the seed supplier, talk to Azzandra, Garland, or King Roald. After you complete your selection, confirm your choice. Regardless of your pick, the council will reject your suggestion, but they have their reasoning. For example, the Fremennik option is not a suitable environment, and Vanescula sees the White Knight as an invading force. Beware: if you log out or exit RS3 Desperate Times section, your selection will be reset.
Once you present the council with three combinations and fail in each, Kerapac will appear to tell you Seren’s plan to please the Elder Gods will fail, which was proposed out of sentiment. He will suggest a new plan, and the council will agree with him, except for Seren. The Kerapac’s plan is to use the Elder Artifacts to put the Elder Gods into permanent sleep. Thok will insist on joining because he believes himself to be enough to scare off the Elder Gods.
Continuing on , Kerapac will give in and instruct you and Thok to travel to the Needle, west of the Piscatoris Fishing Colony. You can use the Phoenix Lair Teleport scroll since it will drop you close to the location. If not, you can use a Fairy Ring (AKQ) to head south of the colony or simply teleport home to the Eagles’ Park Lodestone and take the row boat with Kathy Corkat.
Desperate Times RS3: The Needle
Upon arrival at the Needle, find Keparac and talk to him. He will explain that there is power resonating from the Artifact and ask you if you can feel it. You can pick any option here, so don’t stress too much. Kerapac will tell you he can charge the Needle, but this will cause temporal instabilities to spawn. You will see how five instabilities will spawn, and you can close them by simply clicking on each. Two of those will spawn in the front yard, and two will be on the first floor of the farm house. Lastly, one will spawn nearby the Needle.
Once you close all the instabilities, go to Kerapac. He will tell you that the Elder Artifacts can’t perceive things; they resemble a consciousness. However, the mind of the Needle has refused him. He will state that he needs assistance from Charos, a powerful human mage whose magic affects the minds of others.
This is your sign in Desperate Times RS3 to head to Charos’ Tomb, which is under McGrubor’s Wood. You can use the home teleport to the Seers’ Village Lodestone or use a Fairy Ring (ALS) to head into the woods. Once you are in, you will find the hole for Charos’ Tomb south of the house. You must investigate the coffin when you are there to get a letter from Charos. In this letter, Charos wrote he is aware of what you are doing and wants to meet you. However, he will challenge you to play a game before you find him. For this game, you must locate three keys hidden in three different locations. All the locations are pointed out in the letter, and the keys will empower his Old Necklace, turning it into the Necklace of Charos. This allows you to remove his disguise when you find him. If you destroy the necklace before, you can get another from Uri in the grave under McGrubor’s Wood or, from May’s Storage Chest if you already unlocked it.

Desperate Times RS3: The Keys
You will embark on a short adventure where you must solve a puzzle to find the three keys for Charos. Beware: Once you enter a puzzle room, your progress will reset if you log out or enter the lobby. That said, let’s continue with the RS3 Desperate Times Puzzle Solver section.
First Key
For the first location, you will have to read the following text:
- Once, there was a throne on which the emperor barely sat.
- It fell beneath the soil and vanished.
- But what was buried can rise again.
- I see what has been buried, and I see how to raise it up.
To continue, you must head to the first location, the Varrock Dig Site, near the entrance of the Empty Throne Room. Once there, you will find a group of three archeologists and an examiner talking nearby. There’s a strange portal outside the entrance by Celia Diggory. You must enter the portal, which will lead you to a room with a sliding puzzle in the center. Moreover, several smaller rooms contain chests all around the area. To solve the sliding puzzle and get the key, you must unlock a room with chests. To do so, you have to enter into colored magic portals on the floor. Each color is linked to a door opening, and you can step into the portals as you want because there’s no particular combination.
Once you enter a room with an unlocked chest and another chest within, you must complete a riddle that will give you a four-letter code to enter a combination to unlock the second chest successfully. You won’t be able to leave this room using the exit until you solve the puzzle, though you can teleport yourself out.
You will encounter different riddles, and there is no guarantee which you will face. So, to ensure you can give it your best shot, below we have listed the possible outcomes:
- A note with an old recipe: The amount and every ingredient is represented as a Roman numeral (1=I, 5=V, 10=X, 50=L, 100=C, 500=D, 1,000=M). You must see the grams of each ingredient and take the order of appearance for the code. If it’s not the code, you should take the first letter of each ingredient as the code.
- Four items on the ground that cannot be picked up: The code is the first letter of each item, for example, Plant, Jute Fries, Catfish, and Diamond Bolt; this will result in this code: PJCD. For the order, you must start with the furthest one and end with the nearest one of the chest. If it does not work this way, reverse the code.
- Coins on the ground: The code will be the number of coins in each pile. For the order, you can go from the furthest way and end with the nearest one from the chest or the other way around. This will be represented by Roman numerals. You can use right-click to examine the piles of coins to tell you how many are in each pile.
- A plaque on the outside wall next to the room’s door: The code will be the first letter of the location corresponding to each shield of the Lodestone Network in the order of appearance. Lumbrige, Falador, Draynor Villager, and Varrock, and the code will be LFDV.
- One item on the ground with a four-letter name: The code will be those four letters, for example, Cake, Beer, Cape, etc.
- A clear herb: The code will be HERB
- A rune: The code will be RUNE.
Once you unlock the chest and continue with the puzzle in Desperate Times RS3, it will reveal a part of the word grid, which will solve the sliding puzzle. You must unlock all the chests to complete the word grid and solve the center sliding puzzle. Once you have all the words, you must rearrange the sliding puzzle in the three-by-three layout; match the sliding puzzle with the position in the word grid. When you solve the puzzle, the room will shake, and you will get the first key. This key will automatically combine with the necklace once you get it.
A magic portal will open, allowing you to exit the room. Don’t leave the room before you complete the puzzle, or your progress will be reset.

The Second And Third Keys
You must solve similar puzzles for the second and third key; however, the locations will change. For the second key, you will follow this text:
- Four warriors stand above the water, staring out at the world.
- Northwards stands a mighty home.
- Ascend then to greatness.
- And rest in comfort's luxurious embrace.
This will lead you to the Varrock Palace, in the main bedroom on the first floor. The portal is hidden behind the eastern bath screen. King Roald and Sir Amik Varze are at the table near the stairs. We recommend handling this location last since it’s near the next part of the quest. For the third key, you must read the following text on the letter:
- We do not need, a table round.
- Nor shields of glistening white.
- As the night are, we adorned.
- In strength and power is our allegiance.
In this section of Desperate Times RS3, you must go to the Black Knights’ Fortress, which is in the southeast room near the entrance on the ground floor. You will need an outfit to enter the castle unless you teleport inside using the Skull of Remembrance. You can get the outfit from the armor rack on the northwest exterior wall of the Edgeville Monastery after The Death of Chivalry.
When you finish solving the puzzle and get the two remaining keys, you will get a bloody clue scroll with ‘URIT’ written repeatedly inside. The only different letters spell out ‘RELDO,’ giving you a hint to head directly to the Varrock Palace Library.
The Big Reveal
You must go to the Varrock Palace and talk to Reldo in the library. Use your new empowered necklace, and Charos will reveal himself. Charos will explain that Reldo was a well-placed disguise. Shortly, you will see how Kerapac and Thok will join you to discuss the plan for the next steps regarding the Needle. Kerapac will ask Charos to create a device of his own design that, with some hope, will interact with the Needle.
Immediately after, Thok disapproves of the approach and suggests they can put the Gods into submission instead. Charos tells him to do so, and Thok leaves. Now, Charos will request three Rune Bars, two Runite Stone Spirits, 10 Mind Runes, and 10 Gleaming energy to create the device. Once you get the items, give them to Charos, and he will create the device. He will ask you to meet him at the Needle to continue with Desperate Times in RS3.
Desperate Times RS3: The Device
Upon arrival at the Needle, you will see how Charos prepares to use the device. Before he can carry out the task, Gail appears and attacks him and Thok. Kerapac will send you into the Needle while he tries to keep Gail from ruining the plan.
You will be in the deepest part of Guthix’s Cave. You must wander around and defeat five Sliske to obtain the Broken Mask Shards. When you step into specific areas, the Sliske spawning will be triggered, so you must explore the vast cave to make the five of them spawn. Once you get all the five shards, reassemble the Sliske’s Mask and wear it. While you are picking the fragments, it will reveal that Guthix’s ultimate plan is to create the World Guardian that will protect everyone from the Gods, requiring the Sliskes to die to complete it.

Once you get the Slike’s Mask, wear it and head to the end of the cave, where you can find Guthix. You must click on him to trigger the original Guthix assassination cutscene. When the cutscene finishes, you must continue by leaving the Slike’s body. This will teleport you to Naragun. You must harvest five memories related to Seren, Armadyl, Zamorak, Bandos, and Saradomin. Once you're done doing the harvest, an image of mortal Guthix will appear by the Fairy Ring. You must talk to him, and when you finish, you will be teleported back to his cave. Now, you must redirect the flow from Gail to the avatar of Kerapac by making a switch of each with a Mutable Anima. You will find four switches, two on the top and two on the bottom. If you do this correctly, the light orbs will cross paths twice, once on the upper level and once on the lower one.
When you do this in RS3 Desperate Times, you will appear in a facsimile of the Empyrean Citadel. In the middle of the platform you are on, a Sliske will appear and start talking about Gods, focusing on Jas. You must go to the west inside a room where Gielinor is and use the agility shortcut available; the beginning of this shortcut is outside the southwest corner of the room that has smoke bombs in it. At this point, you should interact with the windows that look like a white fish. Jump the gap, run across the planks, go down the cliff, and then go up to the fish window on the southwest side and climb inside. Climb through the obstacles near the storage crates. Now, you can use the north door to exit.
You must pass all the rooms you complete during the Missing, Presumed, Death quest; however, you will see how Kerapac or Sliske appears to talk about their plans. Once you reach the end, jump down, and you will appear in a new area. From this fall, you will be on the upper platform of Sliske’s Labyrinth, where anima will enter the temporal rifts, as well as you. You should go to a different area of the room. Still, you must charge and redirect anima to go to the avatar of Kerapac. For this section of Desperate Times in RS3, there are four mutable anima to switch: one on the ground level, two on the middle level, and one on the top level.
When you reach the final room at the end of the area of the Dragonkin Laboratory, you will find some nodes colored orange and frozen in place. You must unfreeze them, so you must find the Memory Wisps. These Memory Wisps are in different rooms, so you must go to the northeast room, to the southeast room where you will find Verak Little, on the stairs heading to the west that leads to where the Black Stone Dragon will appear. You will hear Kerapac talk to his son Vicendithas, telling him about his plan to return to Orthen.
When the energy goes directly to Kerapac instead of Gail, a cutscene begins. This cutscene shows Kerapac gaining control over the Needle after he stabs the Staff of Armadyl with it. With Charo’s device, Kerapac allows him to retain his memories. Thanks to this, Gail will be back to her human form, Primrose. Once Kerepac gets the power over the Elder Artifact, he will teleport away and head directly to the east, passing the ocean to prepare for the next phase of his plan.
You must return to Charos to continue with Desperate Times RS3. He will be beyond furious about this double cross from Kerapac. Primrose will leave to see her mother. At this point, the only thing left to do is return to Burthorpe and tell the council what happened.
After you explain what happened, Seren will tell you Kerapac had set up the World Guardian. Since he’s using the Needle’s power, his new plan involves sacrificing Gielinor to destroy the Elder Gods and save the other planets for good. The feeling of betrayal is overwhelming for the council, thanks to this third party’s plan. Now, Seren has to find a way to stop and kill Kerapac with the help of Charos and the council. This will mark the completion of the quest.
RS3 Rewards Desperate Times
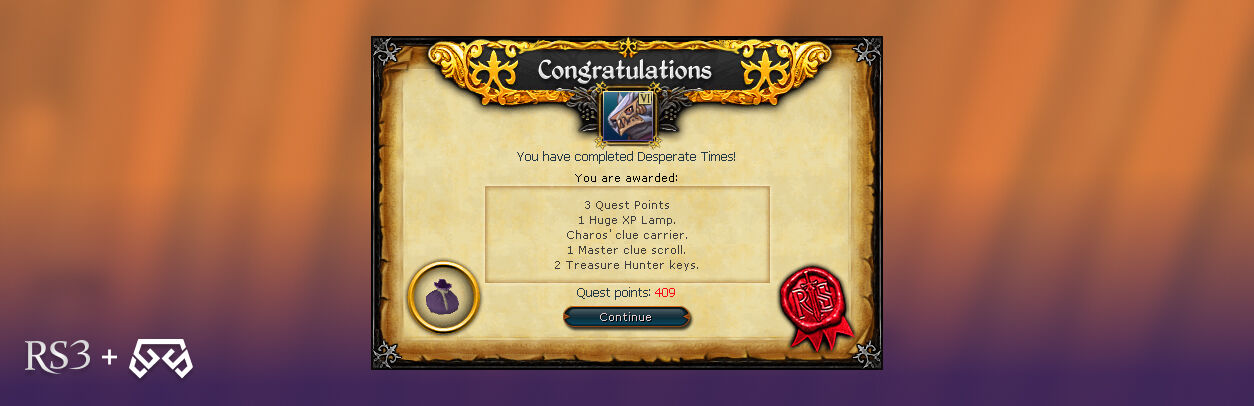
With a bittersweet ending, you have completed Desperate Times RS3. Setting aside all the future problems you no doubt will be involved in, for now, it’s time to see your reward for completing this quest. Here’s what you will get:
- 3 quest points
- A Huge XP Lamp
- Charos' Clue Carrier
- A Master Clue Scroll
- 2 Treasure Hunter keys (Ironman accounts will not receive these)
Desperate Times RS3 FAQ
After a long journey ending with an even bigger problem, you will likely have some questions, so we need to give you all the answers. Let’s begin!
Which Quests Comes After RS3 Desperate Times?
Desperate Times is the third quest in the Elder God Wars quest series, and after completion, the following steps are Archeology, Writing on the Walls, and Desperate Measures.
What Are The Best Ways To Solve The Desperate Times RS3 Puzzles?
Since you must open several chests with different codes, the best way is to take notes every time you unlock a rectangle in the word grid to later use as a guide when moving the sliding puzzle.
Desperate Times RS3 Summary
Desperate times call for desperate measures, but the long quest series will let you explore in-depth all the lore that comes with the weight of solving the problems with Keparac and the Elder Gods. Meanwhile, you can check our blog section for more guides like this. Moreover, you can buy RS3 gold on our page to help you level up faster and find those rare items easily. That’s all for now; see you in the next blog.